
By MisolTap
In the fast-paced environment of modern manufacturing and metalworking, efficiency and precision are paramount. One of the most significant leaps in productivity for machinists and fabricators is learning to transition from manual hand tapping to power tapping. When you use a thread tap with a drill, you exponentially decrease production time while, if executed correctly, maintaining or even improving thread quality. However, this process requires a deep understanding of tooling geometry, torque control, and material science.
Since our founding in 2005, MisolTap has established itself as a leading Chinese manufacturer of high-performance thread cutting tools. We integrate R&D, production, and global sales into a seamless operation, providing our clients with robust and precise threading solutions tailored to modern manufacturing needs. Based on decades of metallurgical research and practical field applications, this comprehensive guide will detail exactly how to successfully use a thread tap with a drill, ensuring you achieve perfect internal threads without the catastrophic failure of a broken tap.
Table of Contents
1. Understanding the Process: Why Use a Thread Tap with a Drill?
Traditionally, tapping an internal thread is a meticulous manual process utilizing a T-handle tap wrench. The operator carefully turns the tool, repeatedly reversing to break the metal chips. While highly controlled, this method is exceptionally slow and physically demanding on large production runs. Therefore, to use a thread tap with a drill has become standard practice in professional fabrication shops.
When you use a thread tap with a drill, you are harnessing the consistent torque and axial alignment of a power tool. This constant rotational force allows for a continuous, clean cut, which often results in a superior surface finish within the threaded hole. However, power tapping leaves no room for error. A slight misalignment or a sudden spike in torque can snap a hardened high-speed steel tap instantly, ruining the workpiece. This makes the selection of the correct tap geometry and drill settings absolutely critical.
2. Essential Tooling for Power Tapping
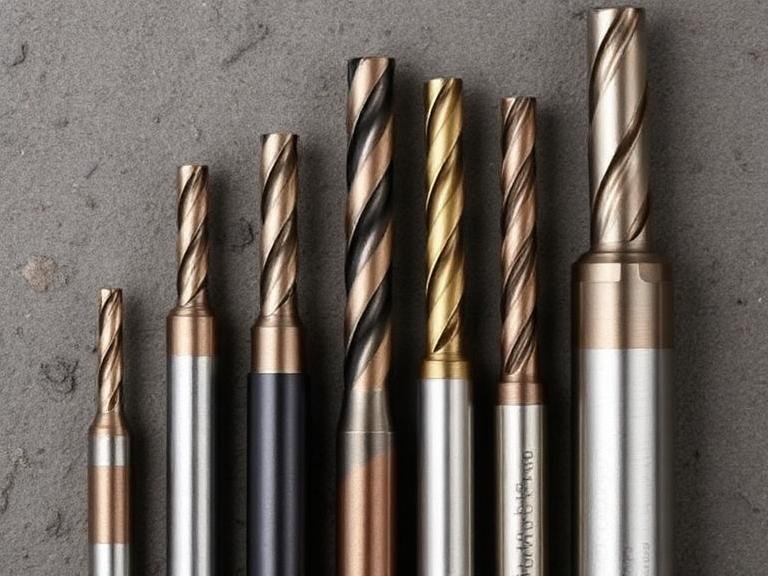
Before you even attempt to use a thread tap with a drill, you must select the appropriate cutting tool. Standard hand taps (often sold in sets of taper, plug, and bottoming taps with straight flutes) are generally unsuitable for power tapping. Straight flutes do not evacuate chips efficiently under continuous rotation, leading to chip packing and tap breakage.
From our experience, you must select machine taps specifically engineered for continuous chip evacuation. At MisolTap, we manufacture several lines of high-performance tools designed precisely for this purpose. Depending on your regional standards and specific application, we recommend the following profiles:
- DIN371 Thread Tap: Characterized by a reinforced shank, the DIN371 Thread Tap is exceptional for power tapping in smaller diameters. The reinforced shank provides superior rigidity, preventing the tap from flexing when you use a thread tap with a drill under high torque conditions.
- IOS-529 Thread Tap: For global manufacturing standard compliance, the IOS-529 Thread Tap offers a highly optimized cutting geometry. It is specifically designed to handle the thermal loads generated during continuous machine tapping, extending tool life and ensuring precise thread pitch generation.
- JIS Thread Tap: The JIS Thread Tap follows Japanese Industrial Standards and is renowned for its aggressive cutting edge and exceptional chip clearing capabilities, making it a favorite for high-speed aluminum and mild steel applications.
For through-holes, a spiral point tap (often called a gun tap) is required, as it shoots the chips forward ahead of the cutting action. For blind holes, a spiral flute tap is necessary to pull the chips up and out of the hole toward the drill chuck.
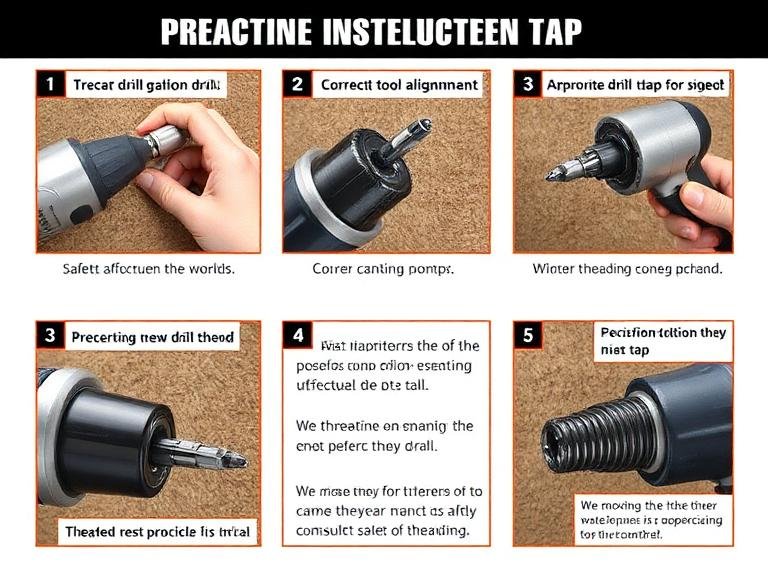
3. Step-by-Step Guide: How to Use a Thread Tap with a Drill
Mastering the technique to use a thread tap with a drill requires strict adherence to procedural steps. Skipping any of these phases will dramatically increase the risk of tool failure.
Step 1: Drilling the Correct Pilot Hole
The foundation of a strong thread is the pilot hole, also known as the tap drill hole. If the hole is too small, the tap will require excessive torque to cut the thread, snapping the tool. If the hole is too large, the thread engagement will be weak, leading to stripped fasteners. You must consult a standard tap drill chart to find the exact drill bit size for your desired thread. For example, an M8x1.25 metric thread requires a precise 6.8mm pilot hole. Ensure you are drilling perfectly perpendicular to the workpiece surface.
Step 2: Securing the Workpiece
When you use a thread tap with a drill, the rotational forces are immense. The workpiece must be immovably secured in a heavy-duty bench vise or clamped firmly to a machine table. Any movement or vibration of the metal during the tapping process will cause lateral stress on the brittle tap, resulting in an immediate fracture.
Step 3: Setting the Drill Clutch and Speed
This is arguably the most critical step when you use a thread tap with a drill. You must use a drill with an adjustable mechanical clutch. Set the clutch to a low setting initially. The goal is for the drill’s clutch to slip and stop spinning if the tap encounters too much resistance, rather than forcing the tap to snap. Furthermore, set your drill to its lowest speed gear (Gear 1). Tapping requires high torque and low RPM. High speeds will generate excessive heat, destroying the temper of your tool, such as your precision JIS Thread Tap.
Step 4: Applying Proper Lubrication
Never tap dry. Copious amounts of high-quality tapping fluid or cutting oil are required. Lubrication reduces friction, cools the cutting edges, and helps flush out metal chips. We recommend applying fluid directly to the flutes of your DIN371 Thread Tap and inside the pilot hole before beginning the cut.
Step 5: Executing the Tapping Process
Chuck the tap securely into the drill jaws, ensuring it is perfectly straight. Position the tip of the tap squarely over the chamfered pilot hole. Apply firm, steady downward pressure and squeeze the drill trigger slowly. The tap will bite into the metal and begin pulling itself downward. Once it catches, stop applying downward force and let the pitch of the tap guide the drill downward. Keep your hands exceptionally steady to maintain perfect vertical alignment. If the clutch slips, back the tap out slightly, clear the chips, add more fluid, and proceed.
Step 6: Backing Out the Tap
Once the required depth is reached, or the tap passes completely through the material, immediately stop the drill. Switch the drill into reverse. Keep your hands perfectly steady to maintain the axis of the hole, and gently squeeze the trigger to back the tap out of the newly cut threads. Do not pull upward; let the threads back the tool out naturally.
4. Expert Recommendations from MisolTap
From our experience supplying high-performance threading solutions globally, the difference between success and failure when you use a thread tap with a drill often comes down to tool rigidity and concentricity. Handheld cordless drills introduce human error regarding alignment. Whenever possible, we recommend utilizing a magnetic base drill press or a dedicated tapping arm for production environments.
Furthermore, when selecting tooling, do not compromise on quality. A premium IOS-529 Thread Tap manufactured by MisolTap undergoes rigorous heat treatment and precision grinding processes that a generic hardware store tap does not. The superior metallurgy in our tools provides the necessary flexural strength to withstand the slight lateral movements that inevitably occur when you use a thread tap with a drill by hand.
We recommend always chamfering the entrance of the pilot hole with a countersink bit before tapping. This slight bevel gives the tap a designated starting guide, drastically reducing the chance of the tap entering the hole at an angle, which is the primary cause of cross-threading and tool breakage.
5. Summary Table: The Power Tapping Process
To ensure you have a quick reference guide on the shop floor, please refer to the following summary of parameters needed when you use a thread tap with a drill.
| Process Parameter | Recommendation for Drill Tapping | MisolTap Expert Note |
|---|---|---|
| Tool Selection | Spiral Point (Through Hole) or Spiral Flute (Blind Hole) | Utilize a DIN371 Thread Tap for superior shank strength. |
| Drill Speed Setting | Low Gear / Low RPM | Heat is the enemy of tool life. Keep RPMs low to preserve cutting edges. |
| Drill Clutch Setting | Low to Medium (depending on tap size) | The clutch must slip before the tap reaches its breaking torque threshold. |
| Lubrication | Continuous flow or heavy application of tapping fluid | Do not use standard motor oil; use dedicated sulfurized or synthetic tapping fluids. |
| Alignment | Perfectly perpendicular to the workpiece | Even a 1-degree deflection can cause a tap to snap during power tapping. |
6. Frequently Asked Questions (FAQs)
7. References
For further reading on metallurgical standards and machining best practices, please consult the following resources: