
Authored by MisolTap — Since our founding in 2005, MisolTap has established itself as a leading Chinese manufacturer of high-performance thread cutting tools. We integrate R&D, production, and global sales into a seamless operation, providing our clients with robust and precise threading solutions tailored to modern manufacturing needs.
In the expansive world of metalworking, machining, and mechanical repair, creating robust internal threads is a foundational skill. While automated Computer Numerical Control (CNC) machines execute high-volume threading operations in modern factories, there are countless scenarios in maintenance, custom fabrication, and prototype development where you must tap a thread by hand. Knowing how to tap a thread by hand accurately ensures that fasteners fit securely, fluid systems seal properly, and mechanical assemblies endure heavy operational stresses.
From our experience at MisolTap, manufacturing world-class cutting tools for nearly two decades, we recognize that hand tapping is equal parts science and tactile art. To successfully tap a thread by hand, an operator must understand tool selection, material properties, optimal pre-drilling techniques, and precise manual execution. This comprehensive engineering guide will walk you through the meticulous steps required to tap a thread by hand safely, accurately, and professionally.
Table of Contents
- 1. Understanding the Fundamentals of Hand Tapping
- 2. Essential Tools Required to Tap a Thread by Hand
- 3. Preparation: The Critical Pre-Drilled Hole
- 4. Step-by-Step Process: How to Tap a Thread by Hand
- 5. Specialized Threading Scenarios
- 6. Troubleshooting Common Hand Tapping Issues
- 7. Summary Reference Table
- 8. Frequently Asked Questions (FAQs)
- 9. Authoritative References
1. Understanding the Fundamentals of Hand Tapping
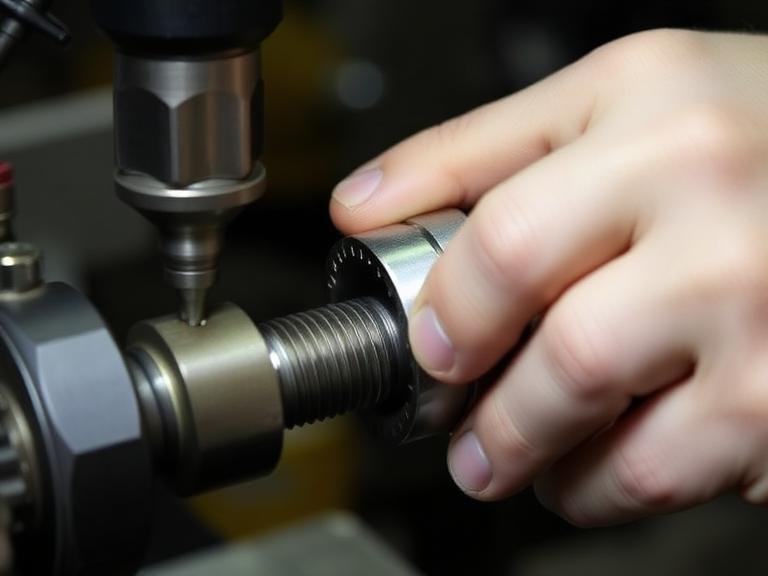
To tap a thread by hand means to manually cut internal threads into a pre-drilled hole using a hardened steel tool called a “tap.” As the tap rotates downward into the material, its fluted cutting edges shear away metal, forming the helical ridges required for screws, bolts, or threaded pipes to engage. When you tap a thread by hand, you rely on human sensory feedback—the physical resistance felt through the tap wrench—to determine chip formation and prevent tool breakage.
At MisolTap, we engineer our taps with specific rake angles and flute geometries designed to minimize friction. However, even the highest-quality tap requires the operator to maintain strict perpendicular alignment. A misalignment of even a single degree can result in oversized, weakened threads or catastrophic tap failure. We recommend utilizing precision measurement tools, such as a machinist’s square, to ensure vertical accuracy when you first begin to tap a thread by hand.
2. Essential Tools Required to Tap a Thread by Hand
Before you attempt to tap a thread by hand, you must assemble a specific set of high-quality tools. Using inferior tools not only compromises thread integrity but also poses significant safety risks.
- The Tap Wrench: A T-handle tap wrench or a straight adjustable tap wrench is required to hold the square drive of the tap securely. It provides the necessary leverage to turn the tool.
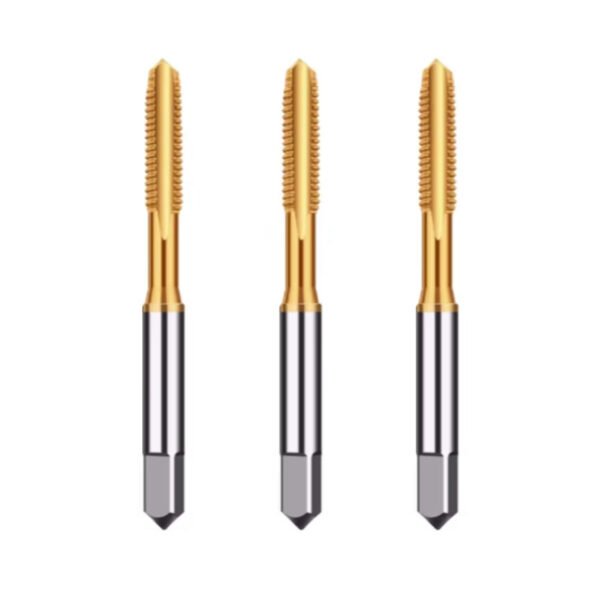
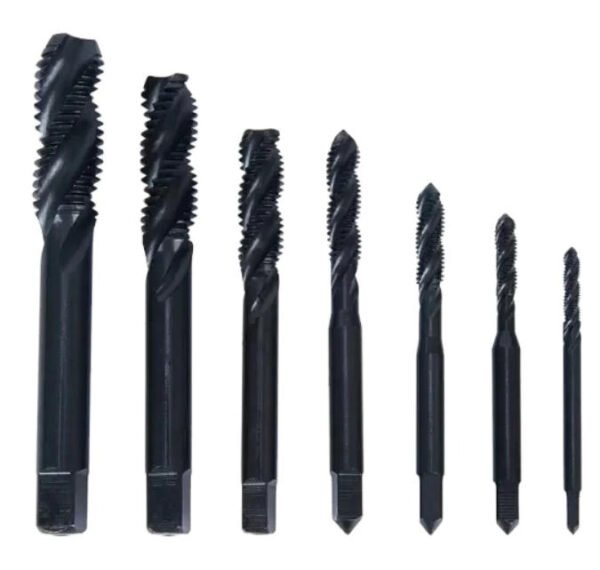
- The Tap Set (Taper, Plug, Bottoming): Taps generally come in three chamfer profiles. We recommend starting with a Taper tap (7-10 chamfered threads) to easily align and initiate the cut. A Plug tap (3-5 chamfered threads) is standard for through holes. A Bottoming tap (1-2 chamfered threads) is used subsequently to bring threads all the way to the bottom of a blind hole.
- Cutting Fluid: Proper lubrication reduces heat, flushes away metal shavings (chips), and creates a smoother thread finish. Using dry taps on steel or aluminum greatly increases the risk of breaking the tool.
- Appropriate Drill Bit: You must create the exact internal diameter required for the tap size. If you are handling aggressive industrial metals, you should explore our insights on the heavy duty tap and drill setups.
3. Preparation: The Critical Pre-Drilled Hole
The success of your effort to tap a thread by hand is heavily dictated by the quality of the pre-drilled hole (often called the tap drill hole). If the hole is too small, the tap will bind and snap due to excessive torque. If the hole is too large, the resulting threads will be shallow, weak, and highly susceptible to stripping under load.
From our experience, calculating the precise tap drill size is mandatory. For standard metric threads, the formula is straightforward: Major Diameter – Pitch = Tap Drill Size. For example, an M8 x 1.25 tap requires a 6.75mm drill bit (8 – 1.25 = 6.75). For Imperial threads, specialized charts must be consulted.
Furthermore, how you drill the metal is just as critical as the size of the bit. Feeding the drill at the wrong RPM can work-harden the material, making it nearly impossible to tap a thread by hand later. For a deep dive into optimal drilling parameters prior to tapping, we highly recommend reading our expert guide on drilling speed for metal. Once the hole is drilled, use a countersink bit to create a slight chamfer at the entrance; this helps the tap catch the material smoothly.
4. Step-by-Step Process: How to Tap a Thread by Hand
Now that the preparation is complete, you are ready to tap a thread by hand. Follow this professional sequence to ensure flawless execution:
Step 1: Secure the Workpiece
Place the metal workpiece firmly into a bench vise. Any movement of the workpiece while you tap a thread by hand will cause lateral stress on the brittle tap, leading to breakage. Ensure the pre-drilled hole is positioned vertically.
Step 2: Apply High-Quality Cutting Fluid
Apply several drops of dedicated tapping fluid to both the tap threads and inside the pre-drilled hole. Do not use standard motor oil or WD-40, as they lack the extreme pressure additives required for metal cutting.
Step 3: Establish Perpendicular Alignment
Insert the tip of the Taper tap into the chamfered hole. Apply firm downward pressure on the tap wrench while turning it clockwise (for a standard right-hand thread). Turn the tap exactly one full revolution. Stop and use a machinist’s square to check the tap from two sides (90 degrees apart) to verify it is perfectly perpendicular to the workpiece surface. Correcting alignment must happen in the first two threads; otherwise, the hole will be irreparably crooked.
Step 4: The Cut-and-Break Technique
This is the most crucial technique when you tap a thread by hand. Turn the tap wrench forward (clockwise) one-half to one-full turn until you feel noticeable resistance. Then, carefully reverse the tap (counter-clockwise) by a quarter to a half turn. You will feel and hear a distinct “click” or “crunch”—this is the metal chip breaking away from the cutting edge and falling into the tap’s flutes. We recommend this “forward-and-back” method consistently. Attempting to drive the tap straight through without breaking the chips will cause the flutes to pack tightly with metal, resulting in a shattered tap.
Step 5: Clearing the Hole
If you are tapping a deep blind hole, back the tap out completely every few turns to clean the chips from the flutes using compressed air or a brush. Reapply cutting fluid before re-inserting the tap. Continue the cut-and-break method until you have reached the desired thread depth.
5. Specialized Threading Scenarios

While standard metric and unified national (UN) threads constitute the bulk of manual operations, there are specialized profiles you will encounter that demand specific approaches.
Tapping Pipe Threads
National Pipe Taper (NPT) threads are designed to create a fluid-tight or gas-tight seal by wedging the tapered threads together. When you tap a thread by hand using an NPT tap, the cutting force increases exponentially as the tap descends due to the taper. You must stop tapping at the precise depth gauge mark. For exact dimensional data and best practices regarding these specific tap profiles, refer to our pipe thread tap size chart as well as our detailed analysis on the 3/8 pipe thread tap size.
Utilizing Reverse Taps
In certain mechanical assemblies, such as left-side bicycle pedals, rotating shafts, or turnbuckles, a left-hand (reverse) thread is required to prevent rotational forces from unscrewing the fastener. To tap a thread by hand in these scenarios, the entire process is mirrored; you apply pressure and turn counter-clockwise to cut, and clockwise to break the chip. For more on this specialized tooling, explore the reverse thread taps guide authored by our engineering team.
6. Troubleshooting Common Hand Tapping Issues
Even seasoned machinists occasionally encounter difficulties. MisolTap, as one of the premier thread tap manufacturers, heavily researches tool failure mechanisms. Here is how to handle common problems when you tap a thread by hand:
- The Tap is Binding Excessively: If turning the tap requires extreme physical exertion, stop immediately. You have either neglected to use cutting fluid, failed to break the chips, or drilled the tap hole too small. Back the tap out, clean the flutes, verify the hole diameter, and apply fresh fluid.
- Stripped or Ragged Threads: This phenomenon, known as “galling,” occurs when the metal tears rather than cuts cleanly. It is common in soft materials like aluminum or titanium. We recommend using a high-sulfur tapping paste and ensuring you are using a sharp, high-speed steel (HSS) tap rather than a dull carbon steel tap.
- A Broken Tap in the Hole: This is a machinist’s nightmare. Because taps are hardened steel, you cannot drill them out with standard bits. You must use a specialized tap extractor tool, which slides hardened steel prongs down the flutes of the broken tap, allowing you to manually back it out. Alternatively, an electrical discharge machine (EDM) process is required.
7. Summary Reference Table
| Process Step | Action to Take | Expert MisolTap Recommendation |
|---|---|---|
| Tool Selection | Select correct tap and tap wrench | Begin with a Taper tap for easier perpendicular alignment. |
| Pre-Drilling | Drill hole to exact tap drill specification | Use formulas or standard charts; countersink the hole edge. |
| Lubrication | Apply tapping fluid to tap and hole | Never tap dry. Use specialized metal cutting fluids. |
| Alignment | Ensure tap is 90 degrees to workpiece | Check visually with a machinist square during the first turn. |
| Cutting Action | 1/2 turn forward, 1/4 turn backward | Always break the chip to prevent the tap flutes from packing tight. |
8. Frequently Asked Questions (FAQs)
Can I use a power drill to tap a thread instead of doing it by hand?
While CNC machines and specialized tapping arms use power, we strongly advise against using a standard handheld power drill to tap a thread. A power drill lacks the sensitive clutch and tactile feedback required to sense chip buildup, almost certainly resulting in a shattered tap. Whenever precision is required outside of a rigid machining center, always tap a thread by hand.
What is the difference between a cut tap and a roll (form) tap?
When you tap a thread by hand, you are almost always using a cutting tap, which removes material to form the thread. A form tap (or roll tap) displaces the metal without producing chips, pressing the threads into shape. Form taps require larger pre-drilled holes and immense torque, rendering them unsuitable for manual hand tapping.
Why do my hand-tapped threads feel loose when I insert the bolt?
Loose threads are the result of an oversized pre-drilled hole or a tap that was not held perfectly straight during the initial cutting phases, causing it to “wobble” and over-cut the major diameter. Always double-check your drill bit size using calipers prior to drilling.
9. Authoritative References
For further reading on international threading standards, metallurgical properties, and industrial machining best practices, we recommend consulting the following authoritative bodies:
- American Society of Mechanical Engineers (ASME) – Standards for Unified Inch Screw Threads (UN and UNR Thread Form).
- National Institute of Standards and Technology (NIST) – Research on advanced materials and precision manufacturing tolerances.
- American National Standards Institute (ANSI) – Guidelines and dimensional tables for National Pipe Threads (NPT) and metric threading systems.
Mastering the ability to tap a thread by hand is a hallmark of a skilled fabricator. By utilizing premium tools from MisolTap, calculating exact drill sizes, employing proper lubrication, and adhering strictly to the cut-and-break technique, you ensure that every thread you produce is robust, accurate, and ready for demanding applications.